I know I'm going to have an headache soon, since ATM we have two branches of the engine. The first branch is the "good" one and dates back to mid july, the other one has been our testing lab for an entire month.
Of course it's buggy but it looks very promising. We're going to fix the second branch and then we'll merge the two. I can't wait to see the new stuff running on the clean version of the engine.
I hope someday I'll be able to post a couple of pics and comment them.
Now, let's move to something better: programming stuff.
Unsurprisingly, as this is a recurring topic in CG, it seems ray marching/ray tracing is going to be the "next big thing". Again.
Maybe you'll want to check this link and have a look at OMPF forums.
I'm not going to share my opinion about the role rays will play in next-gen engines, as "it's hard to make predictions - especially about the future", athough I have to admit I've always been fascinated by "alternative" (non polygon based) rendering algorithms.
To put it simple, a couple of months ago I decided to write a (very) simple ray marcher in my spare time, just to start playing with rays and GPUs.
Today I've added lighting and I'd like to share some pics and links.
First of all if you're interested in ray marching, or distance field rendering you should jump to IQ's website. There's a lot of great stuff there, he also has a developer journal on gamedev.net which definitely deserves (more than just) a look.
I started playing with an heightmap renderer, just to test the basic ray marching machinery.
The idea is quite simple, draw a full screen quad, fire a ray for each pixel on screen and perform steps until it collides with the underlying "geometry", which in the case of an heightmap is a 3D point made up by texel coordinates and the color of the texel itself.
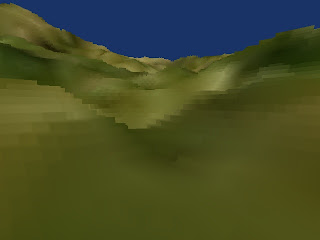
I've decided to go for a true 3D raymarcher, that means I'm able to freely move the camera along any axis. After setting up the rays and displaying stuff around, I've noticed my raymarcher "featured" awful visual artifacts. I borrowed a binary search step from my parallax mapping implementation and it solved them. I wanted to render an heightmap a-la "Comanche: Maximum Overkill". Here's a shot of the first version:

Vintage power!
I expected it would have been enough to enable bilinear filtering and carefully pick up the proper subpixel position to let the GPU smooth my voxels.
Of course that was not the case and I had to write a specific texture fetching routine to smooth them.
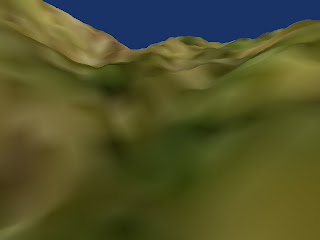
Here's the second version:

That's better
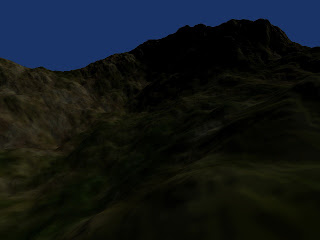
I've added a simple dot(n,l) lighting model, note that lighting is calculated via a "blocky" texture fetch, so it's not as cool as the "geometry":

Blocky lighting on near geometry
Of course the ray marcher also works with volume textures and functions (check IQ's papers for that).
I plan to improve the heightmap renderer, in particular I'd like to speed it up by implementing a cone step mapping algorithm. I'd also like to generate the heightmap and color textures via a shader instead of loading them from image files.
Maybe I can get a 4kb intro out of this simple raymarcher..
4 commenti:
Good for people to know.
Hi! I'm working to a smoke volume rendering/ray marching algorithm and i have the problems you had at the first image (a cucbical landscape). You said you made a "specific texture fetching routine to smooth them". Can you let me have more information about this? like useful links or similiar... Thanks!!!
It's simple. Instead of reading just one texel/voxel, you read more texels/voxels and combine them using different weights.
The smooth landscape pictures have been produced with the following weights:
Central pixel = 50%.
pixels y+1, y-1, x-1, x+1 = 12.5% each.
Of course it's a lot heavier but the results are fine. If you plan to do something like that inside a volume, you need x/y/z +/-1 (6 fetches) and the central voxel.
If I'm allowed to suggest something to speed up this technique, I would try to precalculate those weights into another volume texture. You'll end up with 2 fetches (the real voxel and the weighted one), saving 5 texture fetches.
Posta un commento